skybook 1.41.0 Release Notes
Here is the August 2024 release notes update to skybook version 1.41.0. If you're interested in learning more you can chat to our team.
Jump to the section:
Summary
The skybook EFB app now includes a Centre of Gravity (C of G) tool, to ensure the aircraft stays within the flight envelope. You can now manage fuel uplift details directly within the In-Flight section of the EFB.
It is now possible to lock and hide sectors from the ground portal Record Vault. You can now change the map projection to use the North Polar Stereographic projection when flying over the poles.
Ground Portal updates
Sector Locking
Sectors can now be locked in the Record Vault to prevent any changes being made.
For example, if an investigation is required, locking the sector prevents any further changes or updates being made from that point.
There are two high-level user roles which have the privileges required to lock and unlock sectors:
- Chief Admin - assigned in the User Admin section of the Settings
- Super Admin - can only be assigned by skybook Support.
While a sector is locked, you will find that various actions are restricted:
- You won’t be able to edit, add, or remove audit events
- You won’t be able to modify attachments
- Crew and schedule data updates are also restricted
Operational Flight Plans (OFPs) received after locking the sector will not update it. Automatic transmissions of flight data, such as closure EFFs or AIMS CSV data, will be halted. The sector will remain hidden from view for all users except those with high-level privileges in the Record Vault.
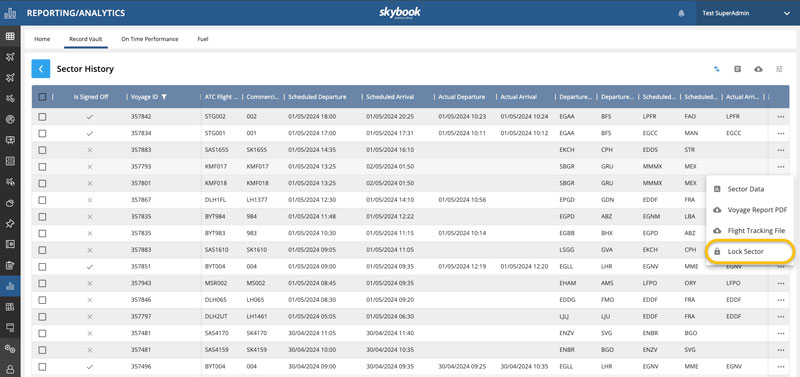
Within the Record Vault section of the Reporting & Analytics module, click the Ellipsis button at the far-right of the row. The Sector Menu is displayed and you can select the Lock Sector option.
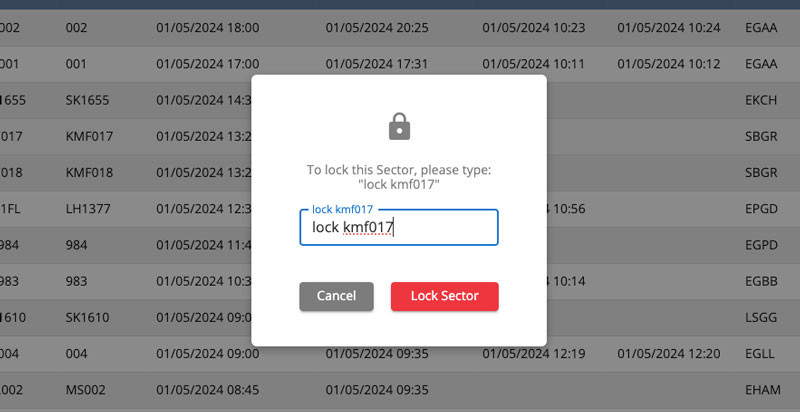
You are presented with a confirmation pop-up message. Enter the text displayed on the pop-up into the text field and then click the Lock Sector button.
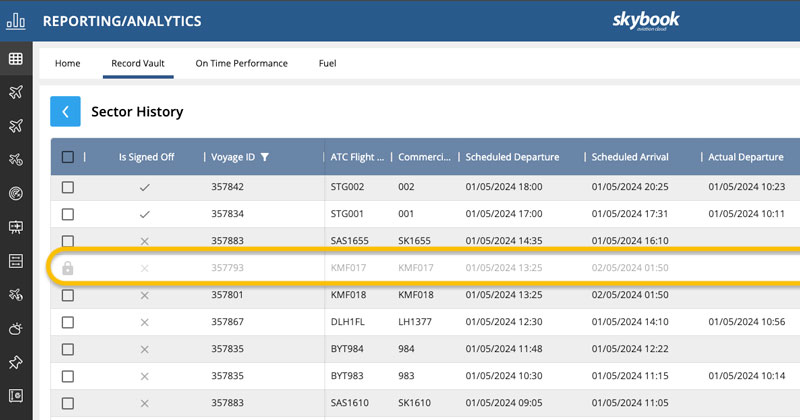
The sector information is now shown as locked for that flight.
You can unlock it by following the same process, clicking the Ellipsis button and this time selecting Unlock Sector. You are presented with a confirmation pop-up message. Enter the text displayed on the pop-up into the text field and then click the Unlock Sector button.
The sector will now be visible again to other users who can make changes as required.
Pop-up messages
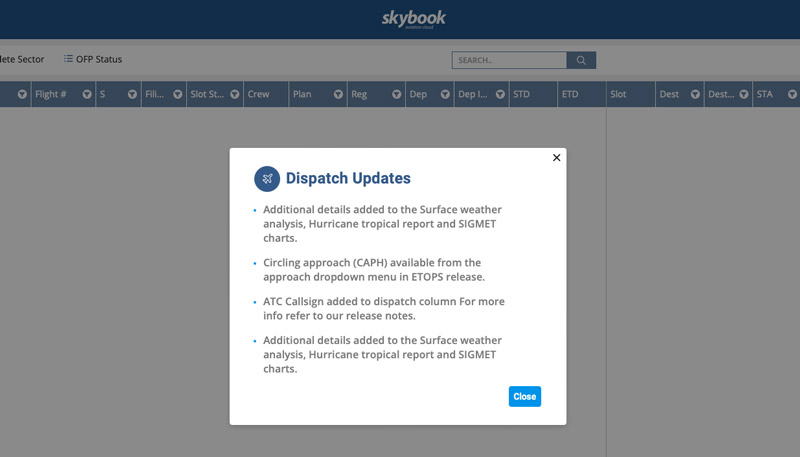
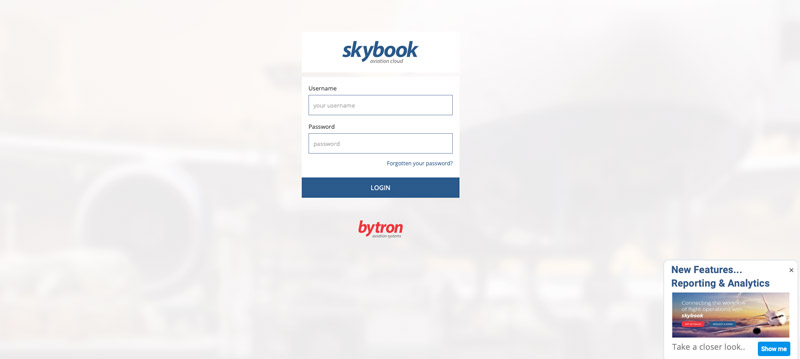
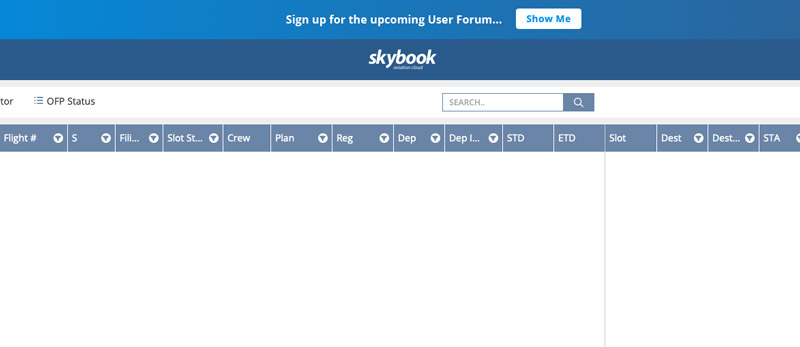
We've added a new feature to the skybook Ground Portal that allows us to display relevant targeted messages directly to you.
These messages will appear periodically to help you discover new features, modules and upcoming webinars that you might find useful.
These may appear on the following pages:
- In the center as a pop-up on the main page
- In the header banner
- On the bottom right corner as an anchor add-on on the login page
Charts - Polar Projection
An issue was reported where charts were plotted incorrectly, causing flight paths to cross the 180° line twice and potentially leading to route deviations.
Longer routes are now plotted without encountering any 180° line problems.
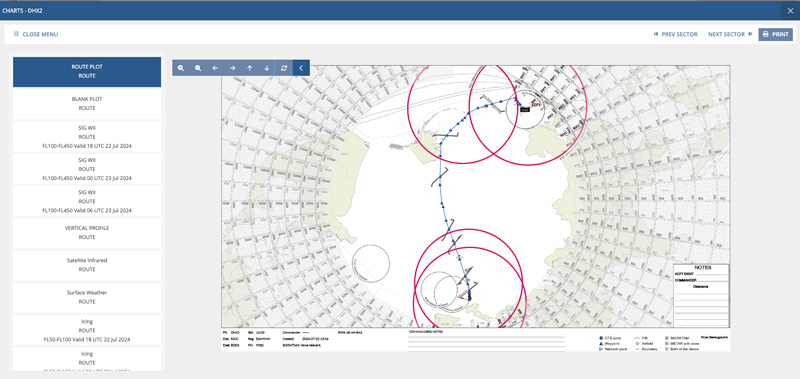
You can now change the map projection to use the North Polar Stereographic projection when flying over the poles. The chart will still support auto-rotating.
See the North Polar Stereographic projection feature in the image:
skybook EFB updates
Centre of Gravity (C of G) Tool
We've introduced a new aircraft Centre of Gravity (C of G) tool within the app to ensure the aircraft weight stays within the required flight envelope.
With this feature, you can perform final zero fuel weight and final takeoff weight calculations, including any Last Minute Changes made from the LMC calculator to ensure the aircraft remains within the required weight and balance after departure. For more information on the LMC calculator, see the previous release notes.
This is not available by default. Please contact your skybook account manager for further information.
Prerequisites
To use the Centre of Gravity tool, you must first:
-
ensure that both the Last Minute Changes (LMC) and Centre of Gravity configurations are set for your fleet on the skybook Ground Portal.
-
configure the Centre of Gravity Envelope on the skybook Ground Portal (See further down)
Procedure
To use the Centre of Gravity tool on the skybook EFB, follow these steps:
1. From the navigation menu, tap on Tools.
2. From the left-side navigation bar, tap on Centre of Gravity.
You will see the following view. Observe the LMC cards at the top of the Centre of Gravity page, which update automatically whenever the LMC calculator is used. The chart displays the Centre of Gravity configuration as plotted points, helping to visualize the aircraft's balance.
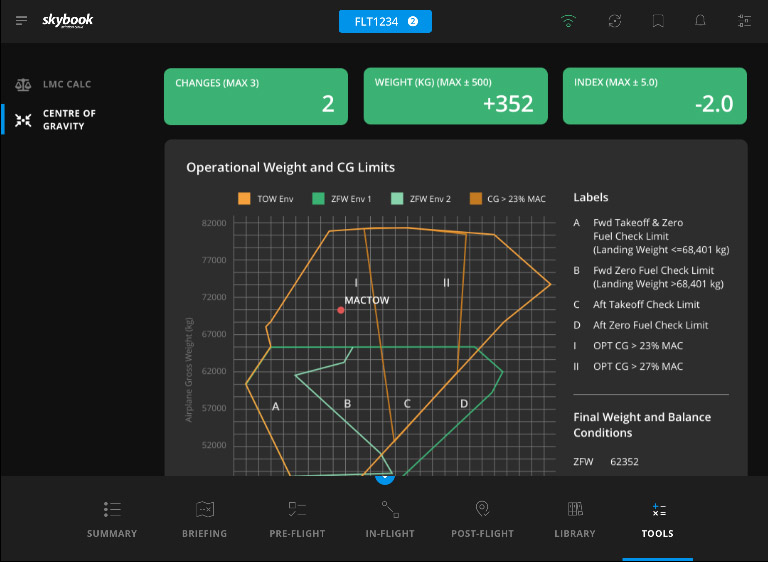
Below the chart, you will see the Centre of Gravity fields:
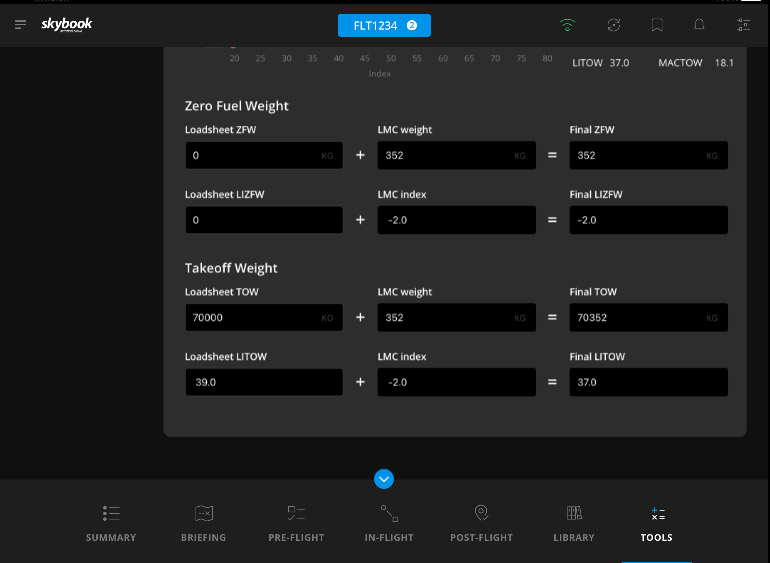
3. Enter values into the following fields:
- Loadsheet ZFW: Zero Fuel Weight
- Loadsheet LIZFW: Loadsheet Index Zero Fuel Weight
- Loadsheet TOW: Takeoff Weight
- Loadsheet LITOW: Loadsheet Index Takeoff Weight
All other fields are read-only and automatically update based on LMC index and weight, as well as the entered loadsheet values.
4. Observe the calculated values displayed in the following fields:
- Final ZFW: Final Zero Fuel Weight
- Final LIZFW: Final Loadsheet Index Zero Fuel Weight
- Final TOW: Final Takeoff Weight
- Final LITOW: Final Loadsheet Index Takeoff Weight
Configuring the Centre of Gravity Envelope
The Centre of Gravity Envelope graph is configured to exactly match specific aircraft and fleet requirements.
1. On the skybook Ground Portal, navigate to the Settings module.
2. In the Settings module, click on the Fleets tab.
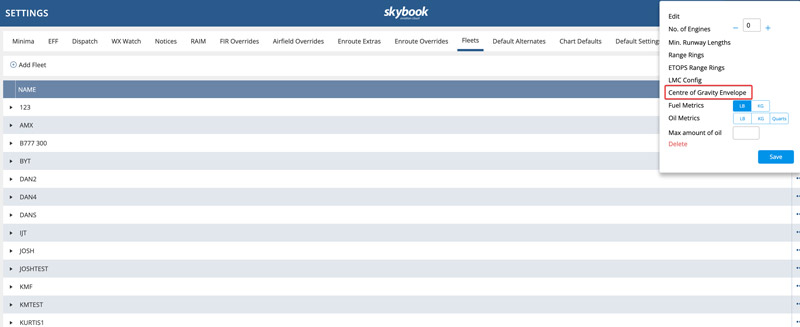
3. Navigate to the row of the fleet you are interested in and click the Ellipsis button next to it. Click Centre of Gravity Envelope.
4. In the Plots section, click + Add Plot Group to add a new plot group. Give it a name and choose a type:
- ZFW Envelope: Zero Fuel Weight Envelope
- TOW Envelope: Take Off Weight Envelope
Choose a color for the plot and, to save you changes, click the Save icon under Actions.
5. To add plots to your plot group, expand the plot group you just created and click + Add Plot.
6. Enter the weight in the Gross section and the index in the Index section. Click the Save icon to save your changes.
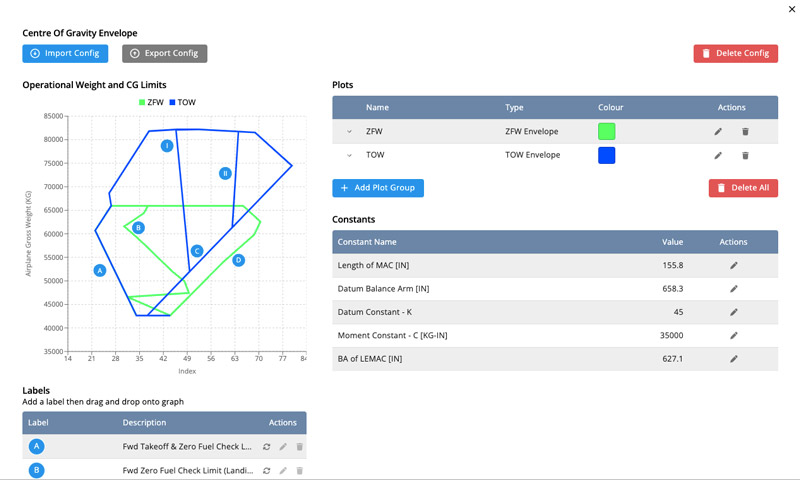
7. In the Labels section, you can create labels. To create a label, add a description and drag and drop them onto the graph. Use labels to distinguish different zones.
8. In the Constants field, you can modify the value of each constant used in the app to calculate the balance arms. Edit them by clicking the Edit icon.
Note: Alternatively to adding your plots manually, you can import your configuration using the Import Config button. Use the Export Config button to export your plot.
Fuel Uplift within In-flight
To simplify the process of managing fuel data, a new section titled Fuel Uplift has been added above Off-Blocks in the In-flight section of the EFB app.
Note: This new section can be configured to be visible or hidden based on your needs.
Procedure
To access the Fuel Uplift section, follow these steps:
1. Navigate to the In-flight section of the app and from the left-side navigation menu, choose Off-Blocks.
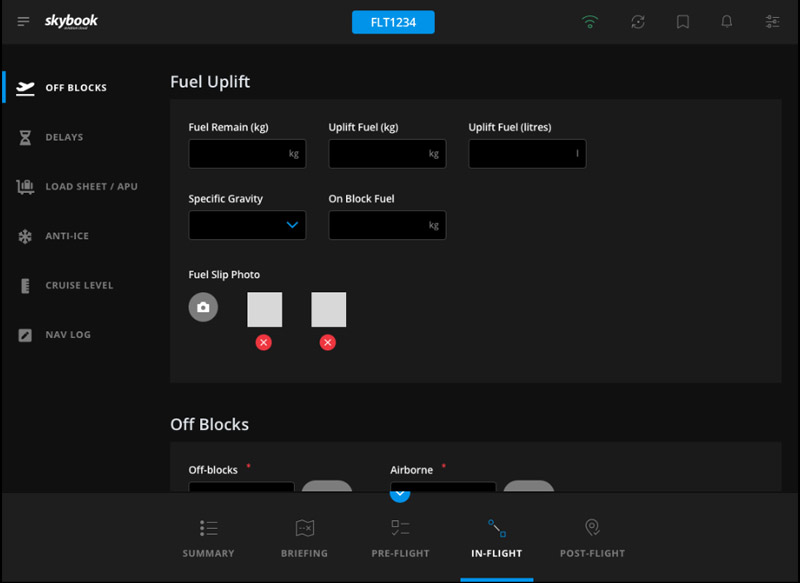
2. In the Fuel Uplift tab, enter fuel data as needed:
- Fuel Remain (kg) - Previous landing fuel
- Uplift Fuel (kg) - Amount of fuel uplifted in kilograms
- Uplift Fuel (litres) - Amount of fuel uplifted in liters
- Specific Gravity - Density of the fuel
- On Block Fuel - Amount fuel onboard the aircraft when it is parked in kilograms
3. In the Fuel Slip Photo field, attach photos of the fuel slip.
Upload ATIS / ATC Images from Gallery
You can now add photos of ATIS and ATC clearances directly from your gallery or camera roll.
This allows you to capture important information provided in paper form and seamlessly integrate these photos into the ATIS/ATC information section within the app.
Procedure
Follow these steps:
1. Navigate to the Pre-Flight module.
2. From the navigation menu on the left, choose ATIS / ATC.
3. Click the round Camera or Select From Gallery button to select an image from your camera roll.
4. Select an image from the pop up.
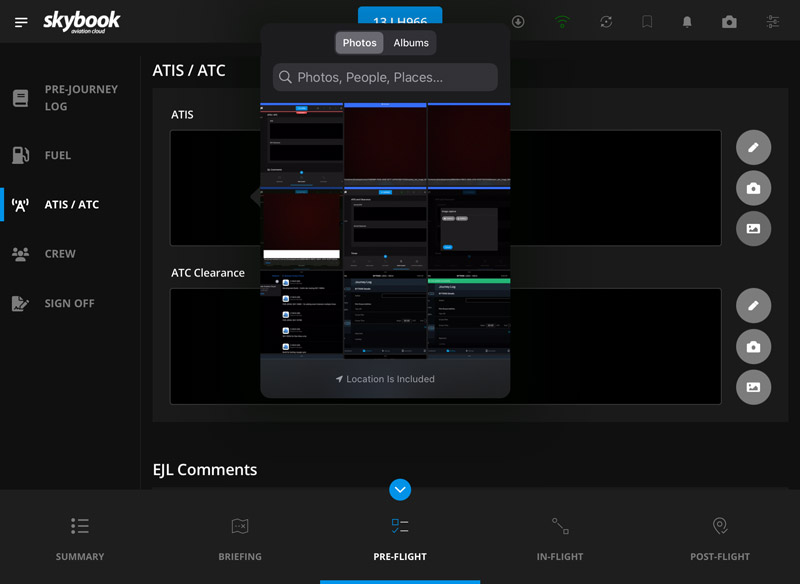
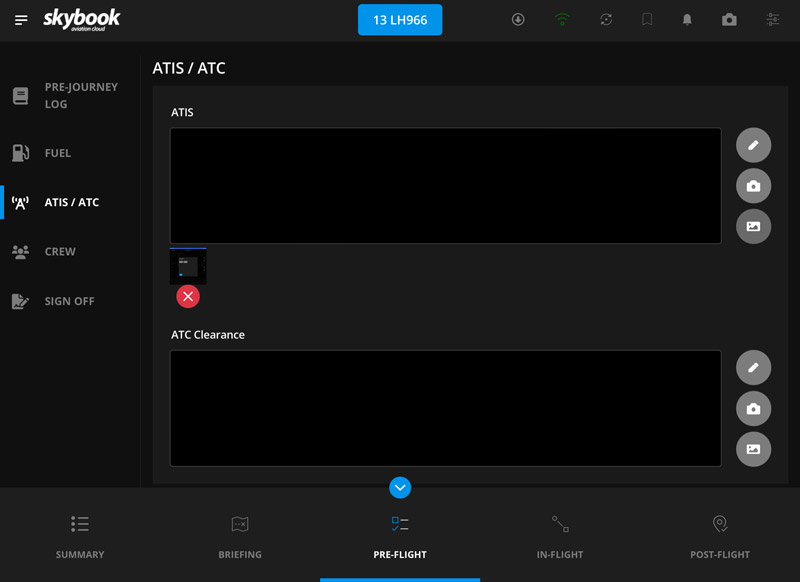
5. Choose the image you want to upload. You will see the selected image at the bottom of the corresponding text input field. You can delete it by clicking the red Delete button.
Customisable Background Colour of the DCT Routing Banner
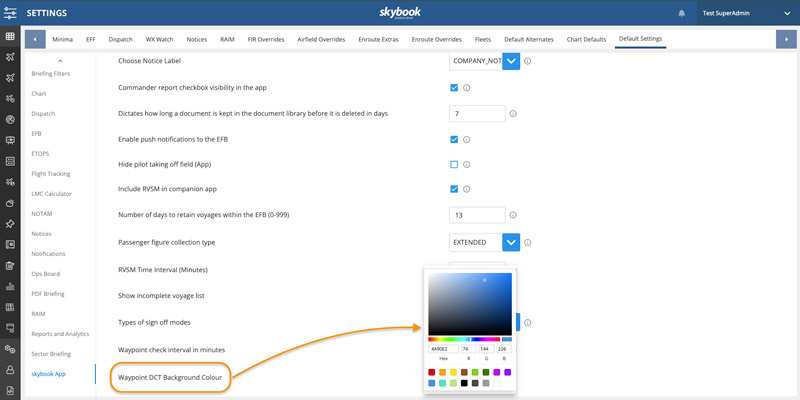
We've introduced a new feature that allows you to customise the background colour of the direct (DCT) routing banner in the Navlog. Change the DCT routing colour via the colour picker in the Ground Portal settings.
Procedure
1. Navigate to Ground Portal → Default Settings → skybook App.
2. Navigate to Waypoint DCT Background Colour and set your preferred background color.
Nav Log Fuel Calculation Correction
We have fixed an issue where the digital Nav Log displayed higher planned fuel requirements at each waypoint compared to the OFP.
Integration updates
Replacement of Turbulence and Icing APIs
We transitioned from WX011 AIM APIs to Boeing Weather Web Map Tile Service for generating Forecast Icing Potential and Graphical Turbulence Guidance charts.
This ensures smoother operations and continued support for our customers who rely on viewing Forecast Icing charts in skybook, even after the retirement of the WX011 API.
Additionally, we’ve introduced new icing and turbulence plotters, providing users with configurable options to replace existing charts.
Furthermore, the turbulence data is now rendered on the charts using the same color coding as before. Charts are now specific to a flight level rather than a flight level range.
Note: This update is only for customers eligible to use Boeing’s HWS weather service.

